
How to create first project in java for Selenium Automation Testing

Creating a New Project
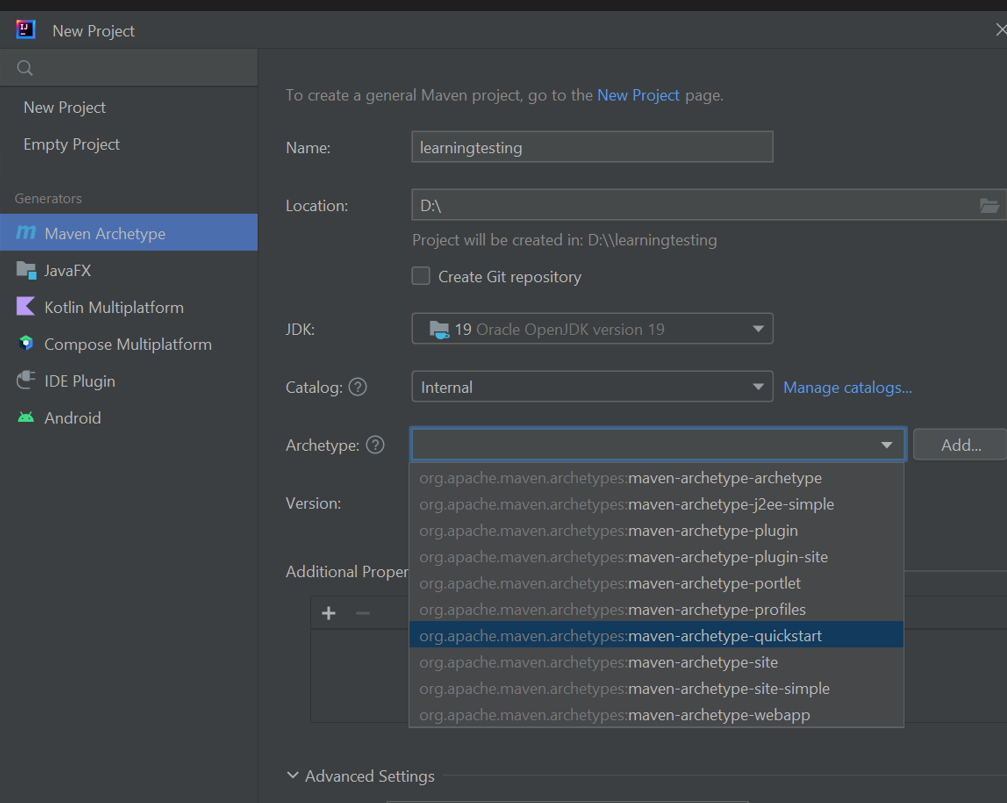
First, open the IntelliJ editor click on “Create New Project” and select Maven archetype option as shown in the below pic.
Next, give the name for the project and set the location (where you want your project to be stored)
For JDK select the latest version of java you downloaded, let the catalog be unchanged
For Architype select maven-architype-quickstart, let the version be unchanged
Now click on the advanced setting,
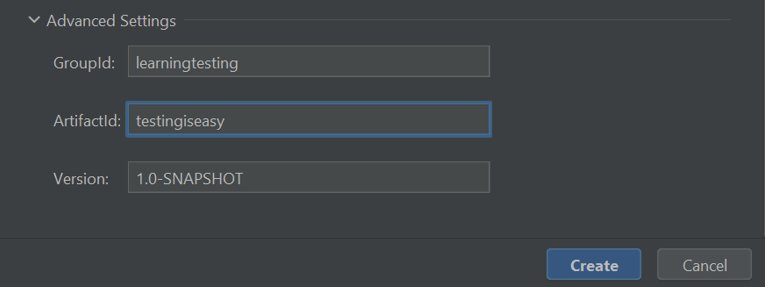
In here, they're going to ask you for a GroupId and an ArtifactId.
• For my GroupId, I'm just going to say “learningtesting” — you name it whatever you want.
• And then for the ArtifactId, that's the same project name that we named in the beginning, we'll just say “testingiseasy”, and then click “create”.
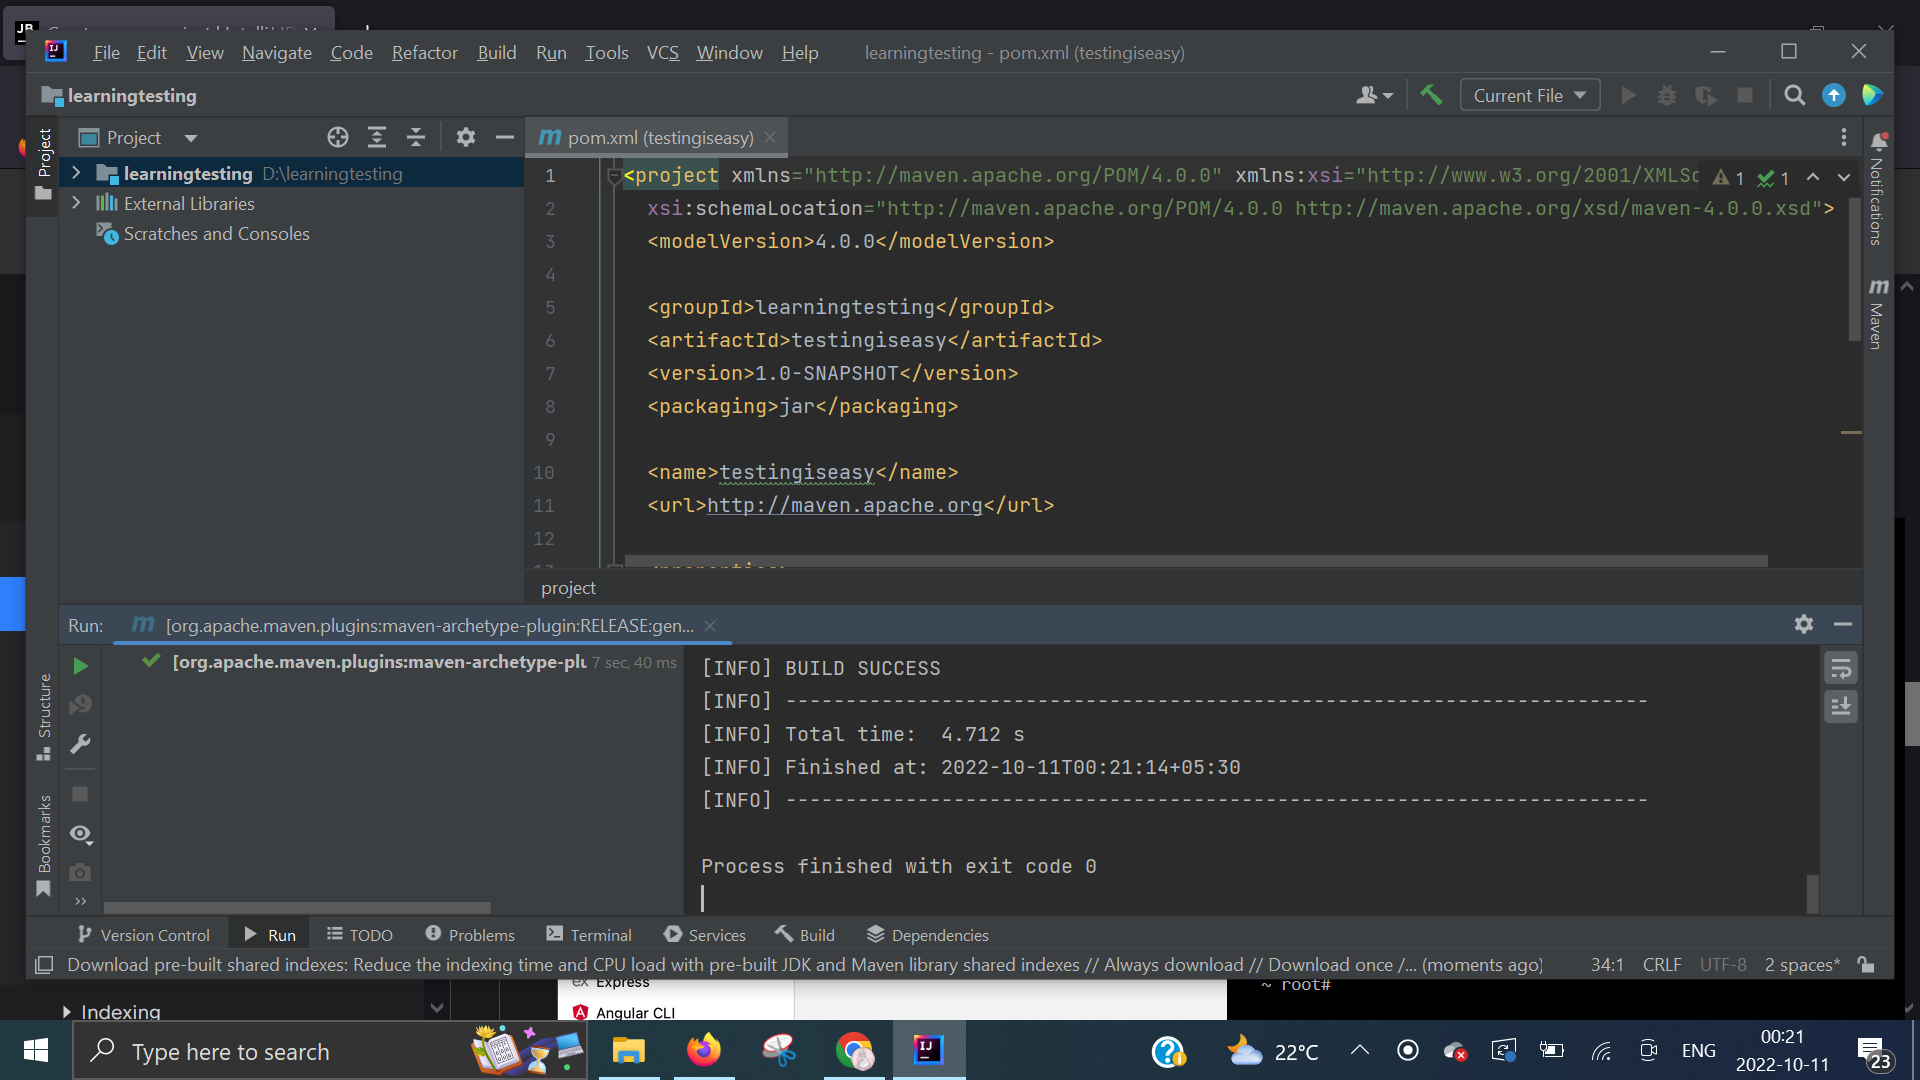
Your window screen will look like this ..and you’ll be able is see the pom.xml file opened and the message “Build Success”.
Now there are a couple of things we want to add into here - the first thing we want to add is the properties.
We are doing this to let IntelliJ know to compile our code using Java 19.
To do that, just paste the given code here after the version information, inside the properties tag.
<properties>
    <maven.compiler.target>1.12</maven.compiler.target>
    <maven.compiler.source>1.12</maven.compiler.source>
</properties>
The next thing we want to do is to add dependencies because we're using Selenium WebDriver.
Click on the link [maven repository] (https://mvnrepository.com/artifact/org.seleniumhq.selenium/selenium-chrome-driver/3.141.59)
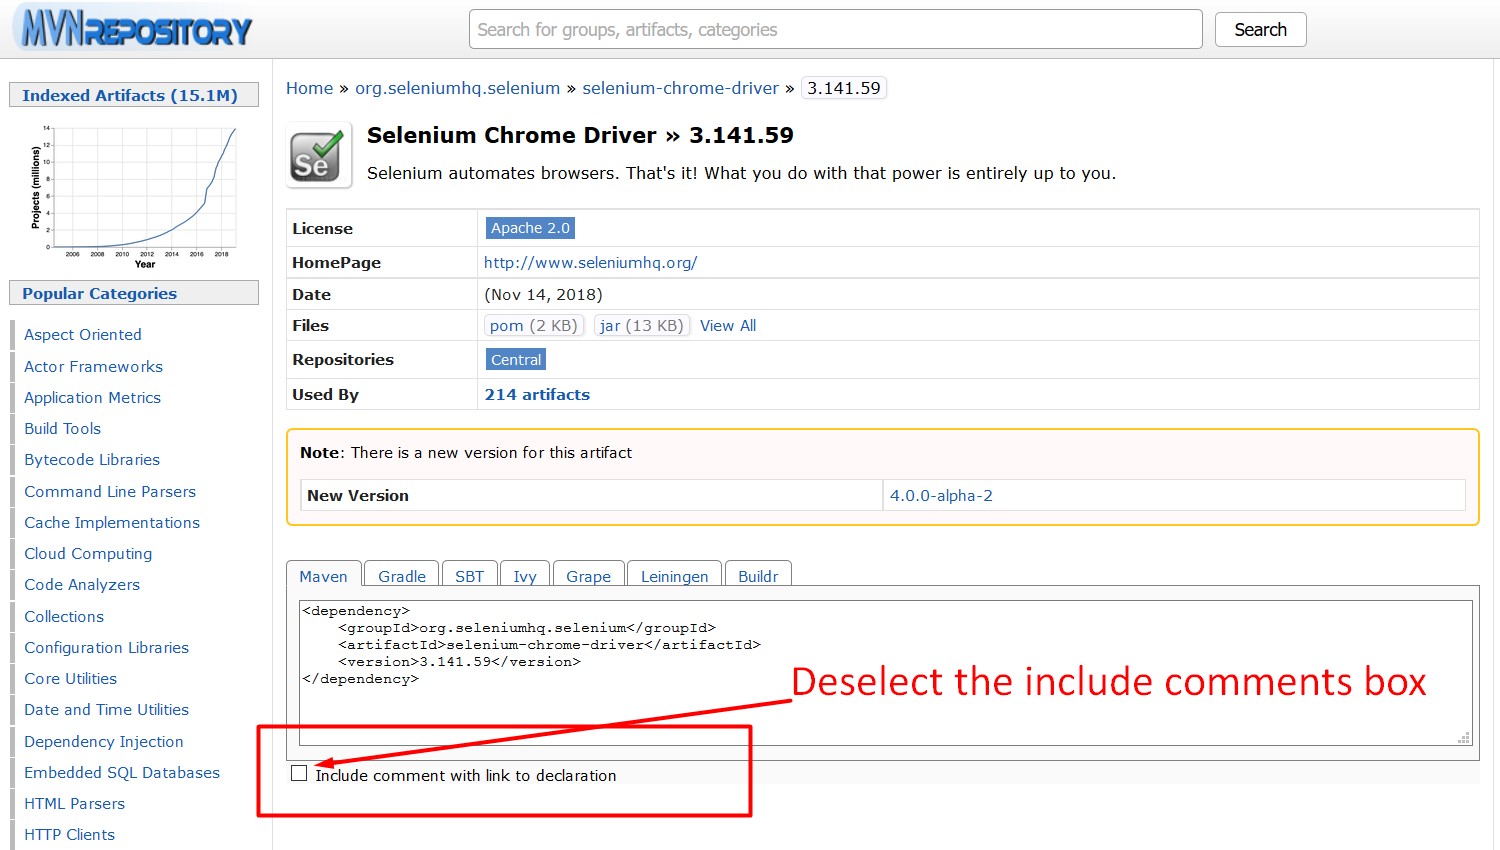
<dependency>
    <groupId>org.seleniumhq.selenium</groupId>
    <artifactId>selenium-chrome-driver</artifactId>
    <version>3.141.59</version>
</dependency>
Now we just copy this whole code and let's go back to our project.
Now, paste this under the properties in pom.xml
Your pom.xml should look like this pom.xml
Go over here in the top right corner and click Maven and refresh it, now click on Dependencies and let's make sure that the dependencies are there.
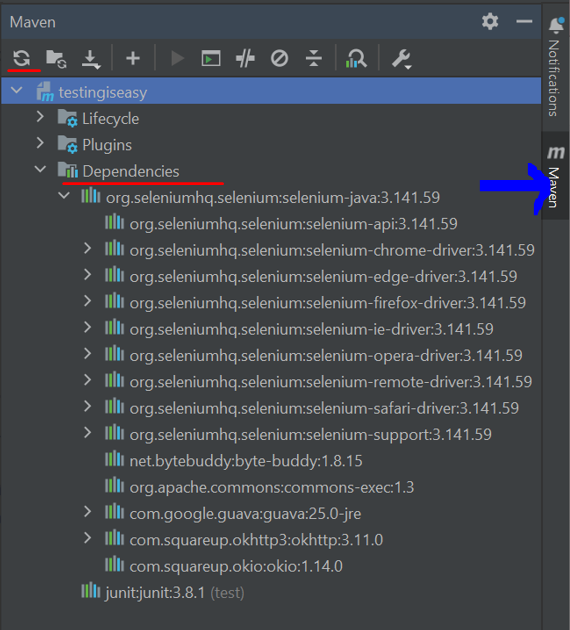
Okay. Once you have your dependency, you can go ahead and close that view.
One last thing,we need to do to get set up.
Remember we downloaded the chromedriver executable? We want to put that inside of our project.
Go ahead to the project, click “Project” here on the left, right-click on the project name and we are going to click “New” > "Directory”.
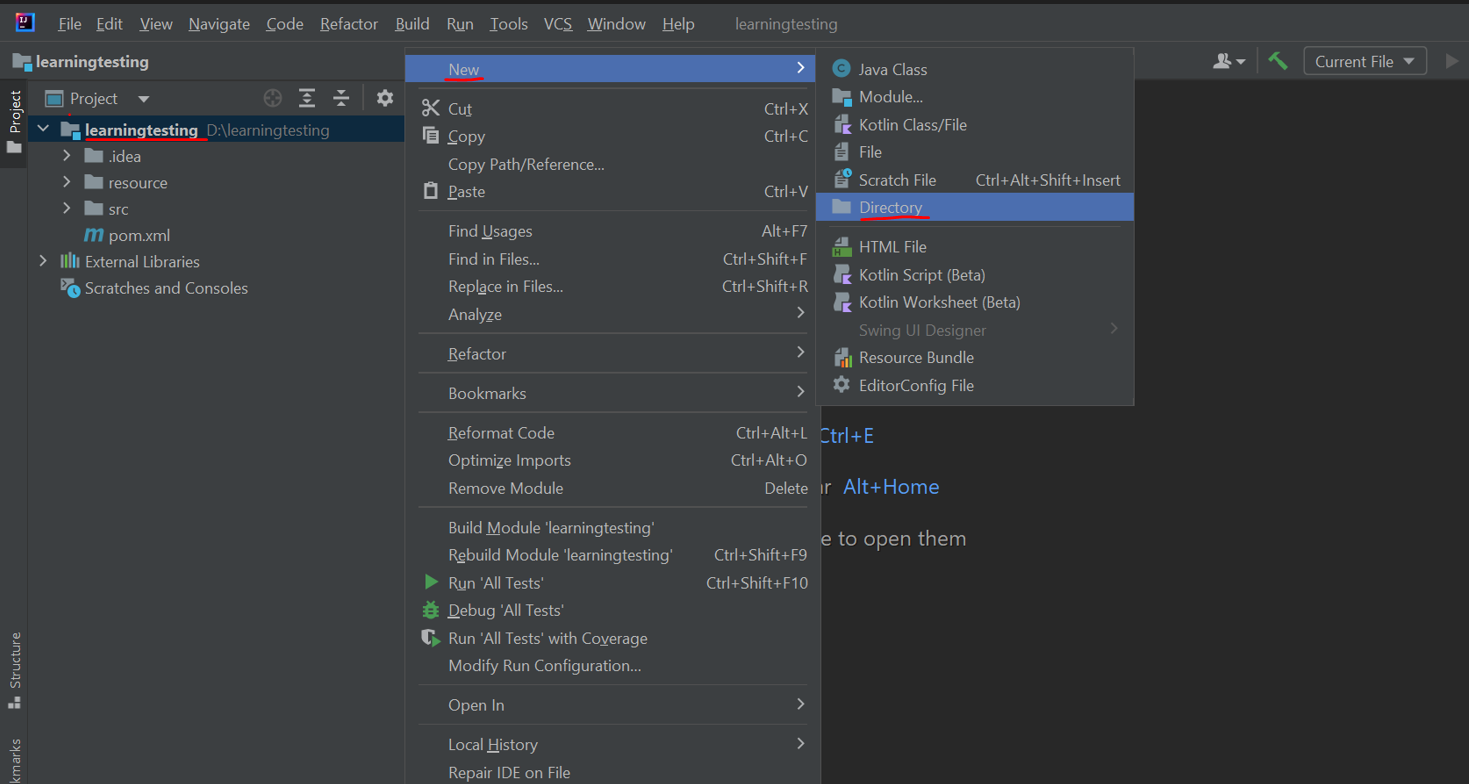
Let's call this as “resources”, in lowercase, and click “OK”.
Next, we're going to move that chromedriver executable into this directory. So just drag the chromedriver.exe file over here to the resources directory and that will add it there.
We see a pop-up and it asks us if this is where we want to move it. We click “OK”, and it's there.
Yes that is it .., now we're all set up. Let’s meet in the next blog and we'll begin writing code 😊