
How to set-up environment for selenium Automation Testing

Let's start!
Resources required..
To get started, Install/ Download the following
- java SE 8 or higher
- IntelliJ/eclipse
- chrome driver
- chrome browser
programming language - java 8 or higher
Editor - IntelliJ/eclipse or any of your choice
Selenium WebDriver can be executed against all of the major browsers, we'll use Chrome. So we need the Selenium chromedriver executable
Let's go ..follow the steps 🙂🙂
To Install java
Click on the given link to download 🔗Java
now scroll up a little, you’ll be able to see the below screen
There are some for Linux, Mac, and Windows. I am going to download it for windows because I am using Windows.
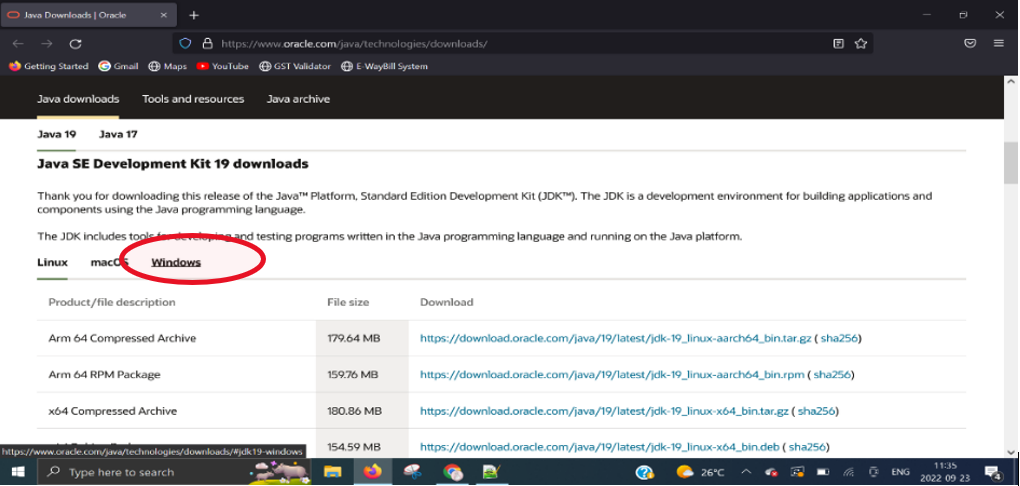
Next you’ll be able to see this.. now click on the (.exe) link given on the right side
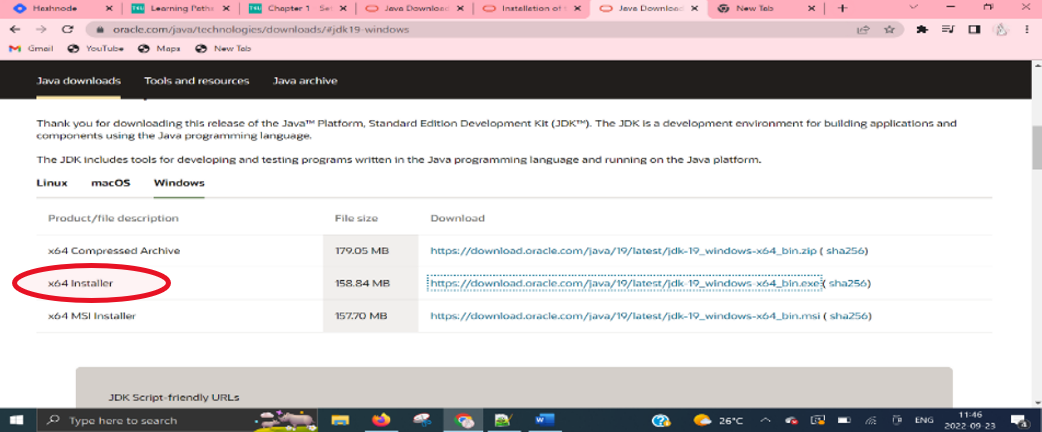
We click on the file name, which begins the download. Open the downloaded file..Just go through the steps and click install and your done
Installing IntelliJ
The next thing we're going to do is to install IntelliJ, which again will be the editor that we write our code in.
Click on the given link to download 🔗 IntelliJ
There are multiple operating systems supported like Windows, Mac, and Linux, so choose the operating system of your choice.

And then there are also 2 options here: one that says Ultimate and one for Community. Let’s choose Community as it is free to use..You just click “DOWNLOAD”.
Once it's finished downloading, just double-click on that file. you'll have an executable that you can use, and it'll walk you through. For Mac, all we need to do is to drag this over and follow any prompts.
Installing Chrome Browser
Next, we're going to install the Chrome browser.
If you already have Chrome, you're fine. Don't worry about this part.
Click here to download 🔗 Chrome Browser
Once the file has been fully downloaded, you simply follow the instructions here on how to finish the installation.
Installing Chrome Driver
Now the last step is to download chromedriver.
This is the WebDriver for Chrome, which is the browser that we'll be using.
We should download the version that’s compatible with your chrome browser ..so first check your chrome browser version,
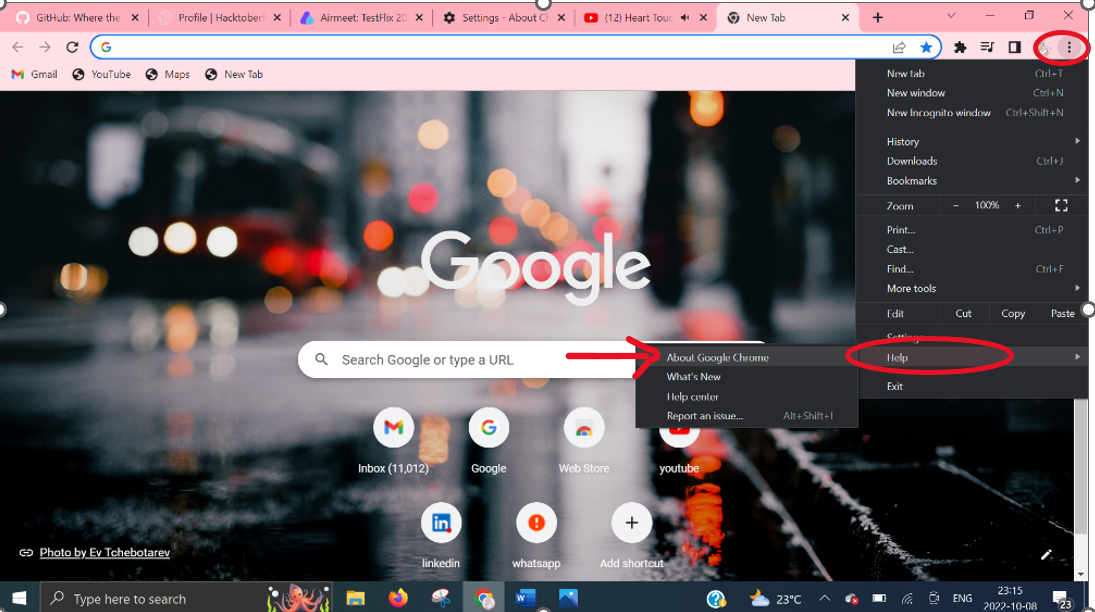
- Open your chrome browser, Click on the hamburger menu in the top right corner then “Help” > “About Google Chrome”.
2.you'll see this page 👇..note down the version
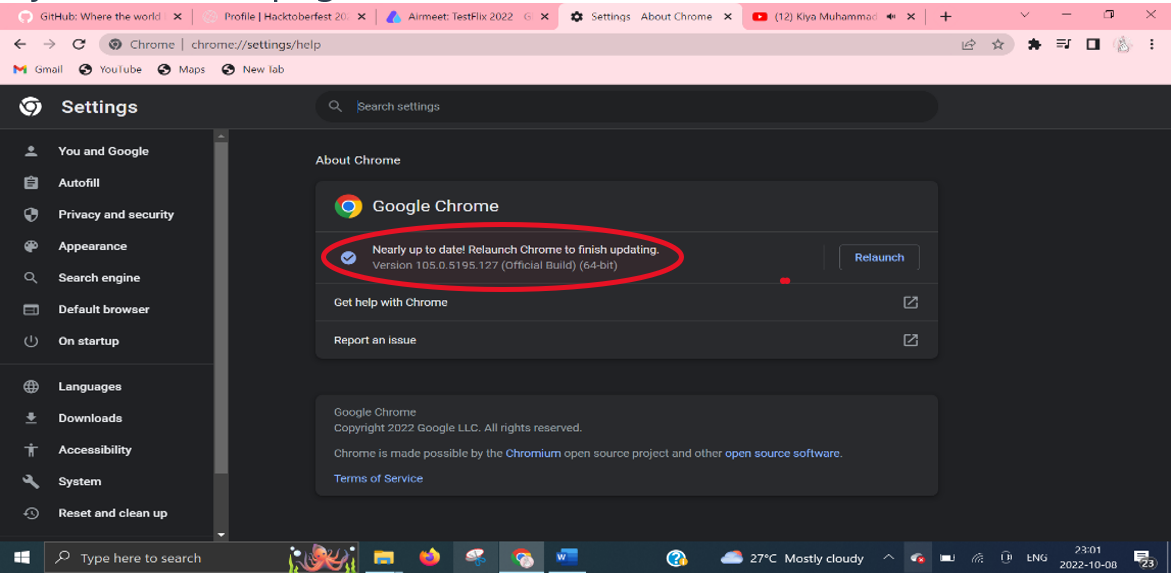
It has to match with whatever version of Chrome that you're actually using.
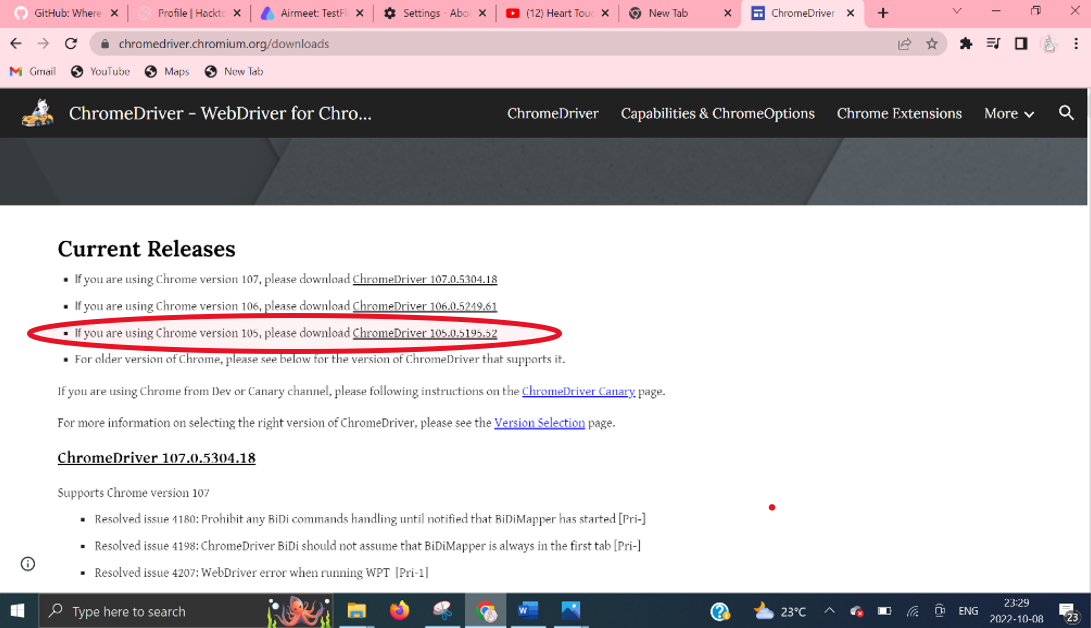
I'm on version 105 so I'm going to need to get the chromedriver that corresponds to this version.
Click here to download 🔗Chromedriver
The below page appears, I clicked on 105 versions download link and you can click your..
I'm on Windows, so I choose the one for Windows. If you're on Linux or Mac, you choose the one for you.
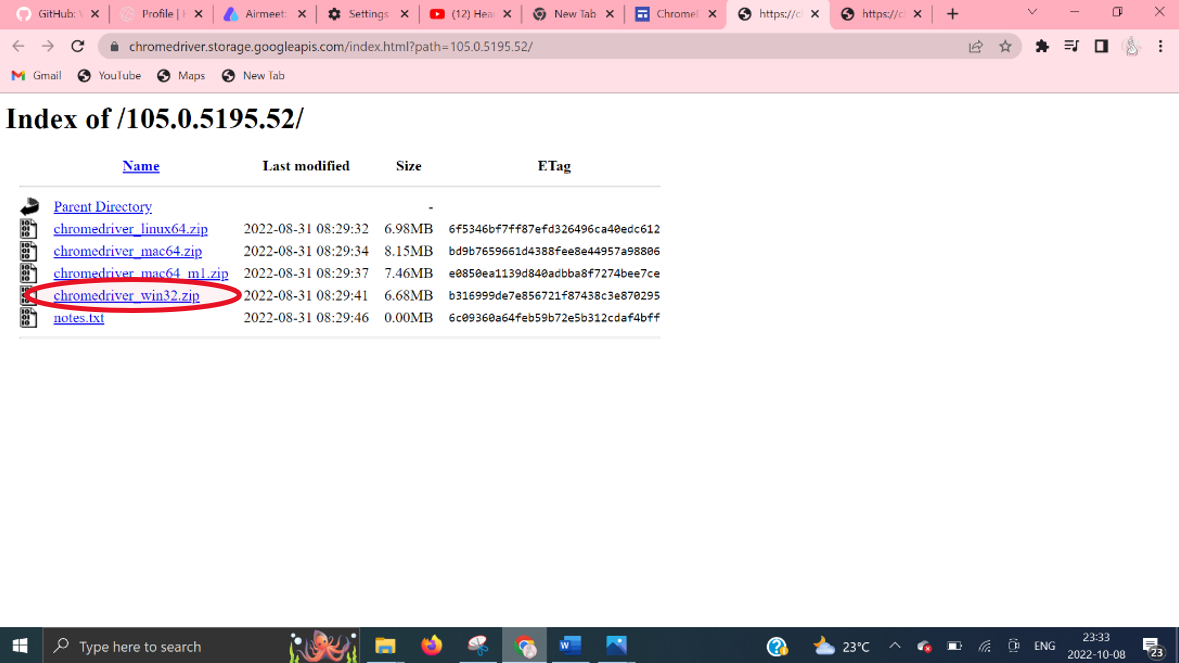
Download this zip file and let's look inside that zip. Okay, so I'm just going to double-click it to unzip it.
When we double-click this, it expanded, and there will be an executable file inside this. If you're on Windows, this will say “chromedriver.exe”. Otherwise, it just says “chromedriver”.
We'll just keep this, and remember where it's stored [in my case it is in the “Downloads” folder] because we'll need to move it to a new location when we start creating the project.
Yes, that is it.. we are done with all the installation part.
Stay tuned for the next blog.. where we'll learn to create our first project!