Table of contents
- What is React js ?
- What You Should Already Know
- Create React App
- Run the React Application
- Modify the React Application
- How does React Work?
- React ES6
- React JSX
- React Components
- React Events
- React Conditional Rendering
- React Lists
- React Forms
- React Router
- Styling React Using CSS
- 🍯 Contributors:
- Community and Social Footprints :

What is React js ?
React is a JavaScript library for building user interfaces.
React is used to build single-page applications.
React allows us to create reusable UI components.
What You Should Already Know
Before starting with React.JS, you should have intermediate experience in:
- HTML
- CSS
- JavaScript
You should also have some experience with the new JavaScript features introduced in ECMAScript 6 (ES6)
Create React App
To learn and test React, you should set up a React Environment on your computer.
This tutorial uses the create-react-app.
The create-react-app tool is an officially supported way to create React applications.
Node.js is required to use create-react-app.
Installation of NVM for Node js and Npm version management
curl -o- https://raw.githubusercontent.com/nvm-sh/nvm/v0.38.0/install.sh | bash

source ~/.bashrc

nvm list-remote

nvm install v16.17.0


# node version
node --version

#npm version
npm --version
Open your terminal in the directory you would like to create your application.
Run this command to create a React application named my-react-app
npx create-react-app my-react-app
Run the React Application
Run this command to move to the my-react-app directory
cd my-react-app

npm start

Modify the React Application
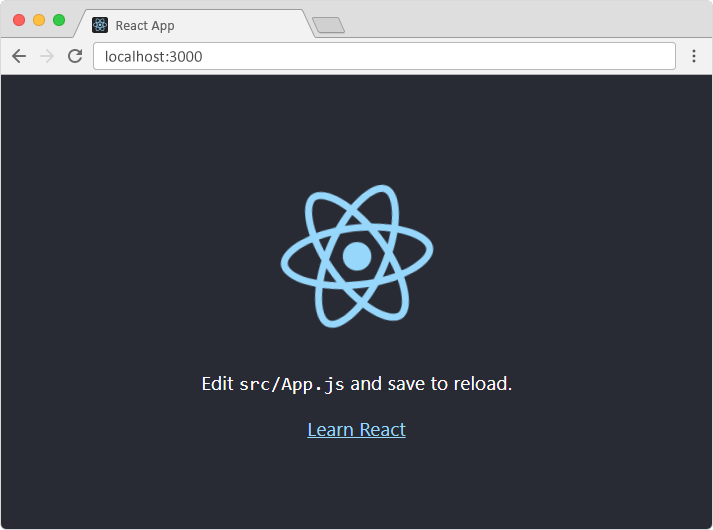
Look in the my-react-app directory, and you will find a src folder. Inside the src folder there is a file called App.js, open it and it will look like this:
import logo from './logo.svg';
import './App.css';

function App() {
  return (
    <div className="App">
      <header className="App-header">
        <img src={logo} className="App-logo" alt="logo" />
        <p>
          Edit <code>src/App.js</code> and save to reload.
        </p>
        <a
          className="App-link"
          href="https://reactjs.org"
          target="_blank"
          rel="noopener noreferrer"
        >
          Learn React
        </a>
      </header>
    </div>
  );
}

export default App;
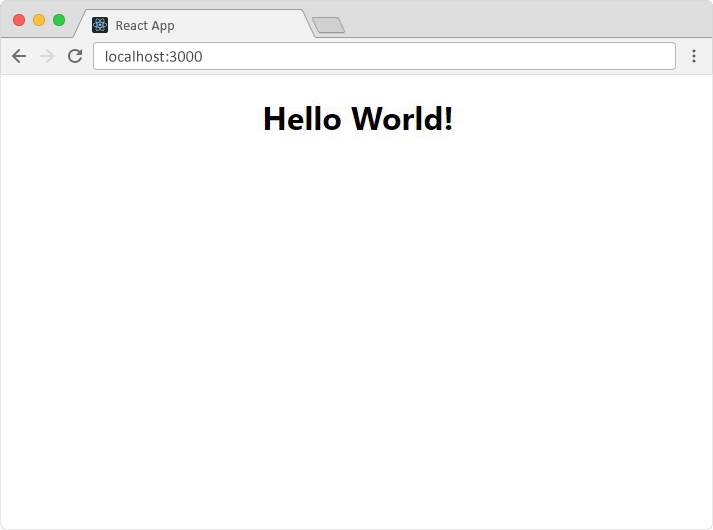
Try changing the HTML content and save the file.
function App() {
  return (
    <div className="App">
      <h1>Hello World!</h1>
    </div>
  );
}

export default App;
See the changes in the browser when you click Save.

How does React Work?
React creates a VIRTUAL DOM in memory.
Instead of manipulating the browser's DOM directly, React creates a virtual DOM in memory, where it does all the necessary manipulating, before making the changes in the browser DOM.
React only changes what needs to be changed!
React finds out what changes have been made, and changes only what needs to be changed.
React ES6
What is ES6 ?
ECMAScript was created to standardize JavaScript, and ES6 is the 6th version of ECMAScript, it was published in 2015, and is also known as ECMAScript 2015.
Why Should I Learn ES6?
React uses ES6, and you should be familiar with some of the new features like:
- Classes
- Arrow Functions
- Variables (let, const, var)
- Array Methods like .map()
- Destructuring
- Modules
- Ternary Operator
- Spread Operator
Classes
class Car {
  constructor(name) {
    this.brand = name;
  }

  present() {
    return 'I have a ' + this.brand;
  }
}

const mycar = new Car("Ford");
mycar.present();
Arrow Functions
hello = () => {
  return "Hello World!";
}
Variables
Now, with ES6, there are three ways of defining your variables: var, let, and const.
# var has a function scope, not a block scope.
var x = 5.6;


# let has a block scope.
let x = 5.6;


# const has a block scope.
const x = 5.6;
Array Methods
In React, map() can be used to generate lists.
const myArray = ['apple', 'banana', 'orange'];

const myList = myArray.map((item) => <p>{item}</p>)
Destructuring
Destructuring is exactly the same. We may have an array or object that we are working with, but we only need some of the items contained in these.
const vehicles = ['mustang', 'f-150', 'expedition'];

const [car, truck, suv] = vehicles;
Spread Operator
The JavaScript spread operator (...) allows us to quickly copy all or part of an existing array or object into another array or object.
const numbersOne = [1, 2, 3];
const numbersTwo = [4, 5, 6];
const numbersCombined = [...numbersOne, ...numbersTwo];
Modules
JavaScript modules allow you to break up your code into separate files.
ES Modules rely on the import and export statements.
Named Exports
const name = "Jesse"
const age = 40

export { name, age }
Default Exports
You can only have one default export in a file.
const message = () => {
  const name = "Jesse";
  const age = 40;
  return name + ' is ' + age + 'years old.';
};

export default message;
Import
You can import modules into a file in two ways, based on if they are named exports or default exports.
#Import from named exports

import { name, age } from "./person.js";

# Import from default exports

import message from "./message.js";
Ternary Operator
Syntax: condition ?(expression if true) : (expression if false)
authenticated ? renderApp() : renderLogin();
React JSX
What is JSX?
- JSX stands for JavaScript XML.
- JSX allows us to write HTML in React.
- JSX makes it easier to write and add HTML in React.
JSX allows us to write HTML elements in JavaScript and place them in the DOM without any createElement() and/or appendChild() methods.
JSX converts HTML tags into react elements.
You are not required to use JSX, but JSX makes it easier to write React applications.
Example
const myElement = <h1>I Love JSX!</h1>;

const root = ReactDOM.createRoot(document.getElementById('root'));
root.render(myElement);
React Components
Components are like functions that return HTML elements.
Components are independent and reusable bits of code. They serve the same purpose as JavaScript functions, but work in isolation and return HTML.
Components come in two types,
- Class components,
- Function components
Class Component
A class component must include the extends React.Component statement. This statement creates an inheritance to React.Component, and gives your component access to React.Component's functions.
React Class components have a built-in state object.
You might have noticed that we used state earlier in the component constructor section.
The state object is where you store property values that belongs to the component.
When the state object changes, the component re-renders.
Lifecycle of Components
Each component in React has a lifecycle which you can monitor and manipulate during its three main phases.
- Mounting,
- Updating,
- Unmounting.
class Car extends React.Component {
  constructor() {
    super();
    this.state = {color: "red"};
  }
  render() {
    return <h2>I am a {this.state.color} Car!</h2>;
  }
}
Function Component
A Function component also returns HTML, and behaves much the same way as a Class component, but Function components can be written using much less code, are easier to understand, and will be preferred in this tutorial.
function Car() {
  return <h2>Hi, I am a Car!</h2>;
}
Props
Components can be passed as props, which stands for properties.
Props are like function arguments, and you send them into the component as attributes.
function Car(props) {
  return <h2>I am a { props.brand.model }!</h2>;
}

function Garage() {
  const carInfo = { name: "Ford", model: "Mustang" };
  return (
    <>
      <h1>Who lives in my garage?</h1>
      <Car brand={ carInfo } />
    </>
  );
}

const root = ReactDOM.createRoot(document.getElementById('root'));
root.render(<Garage />);
React Events
Just like HTML DOM events, React can perform actions based on user events.
React has the same events as HTML: click, change, mouseover etc.
Example Onclick event
function Football() {
  const shoot = () => {
    alert("Great Shot!");
  }

  return (
    <button onClick={shoot}>Take the shot!</button>
  );
}

const root = ReactDOM.createRoot(document.getElementById('root'));
root.render(<Football />);
React Conditional Rendering
In React, you can conditionally render components.
if Statement
We can use the if JavaScript operator to decide which component to render.
function MissedGoal() {
  return <h1>MISSED!</h1>;
}

function MadeGoal() {
  return <h1>Goal!</h1>;
}


function Goal(props) {
  const isGoal = props.isGoal;
  if (isGoal) {
    return <MadeGoal/>;
  }
  return <MissedGoal/>;
}

const root = ReactDOM.createRoot(document.getElementById('root'));
root.render(<Goal isGoal={false} />);
Logical && Operator
Another way to conditionally render a React component is by using the && operator.
function Garage(props) {
  const cars = props.cars;
  return (
    <>
      <h1>Garage</h1>
      {cars.length > 0 &&
        <h2>
          You have {cars.length} cars in your garage.
        </h2>
      }
    </>
  );
}

const cars = ['Ford', 'BMW', 'Audi'];
const root = ReactDOM.createRoot(document.getElementById('root'));
root.render(<Garage cars={cars} />);
Ternary Operator
Another way to conditionally render elements is by using a ternary operator.
function Goal(props) {
  const isGoal = props.isGoal;
  return (
    <>
      { isGoal ? <MadeGoal/> : <MissedGoal/> }
    </>
  );
}

const root = ReactDOM.createRoot(document.getElementById('root'));
root.render(<Goal isGoal={false} />);
React Lists
In React, you will render lists with some type of loop.
The JavaScript map() array method is generally the preferred method.
function Car(props) {
  return <li>I am a { props.brand }</li>;
}

function Garage() {
  const cars = [
    {id: 1, brand: 'Ford'},
    {id: 2, brand: 'BMW'},
    {id: 3, brand: 'Audi'}
  ];
  return (
    <>
      <h1>Who lives in my garage?</h1>
      <ul>
        {cars.map((car) => <Car key={car.id} brand={car.brand} />)}
      </ul>
    </>
  );
}

const root = ReactDOM.createRoot(document.getElementById('root'));
root.render(<Garage />);
React Forms
Just like in HTML, React uses forms to allow users to interact with the web page.
Handling forms is about how you handle the data when it changes value or gets submitted.
In HTML, form data is usually handled by the DOM.
In React, form data is usually handled by the components.
When the data is handled by the components, all the data is stored in the component state.
You can control changes by adding event handlers in the onChange attribute.
We can use the useState Hook to keep track of each inputs value and provide a "single source of truth" for the entire application.
import { useState } from 'react';
import ReactDOM from 'react-dom/client';

function MyForm() {
  const [inputs, setInputs] = useState({});

  const handleChange = (event) => {
    const name = event.target.name;
    const value = event.target.value;
    setInputs(values => ({...values, [name]: value}))
  }

  const handleSubmit = (event) => {
    event.preventDefault();
    alert(inputs);
  }

  return (
    <form onSubmit={handleSubmit}>
      <label>Enter your name:
      <input
        type="text"
        name="username"
        value={inputs.username || ""}
        onChange={handleChange}
      />
      </label>
      <label>Enter your age:
        <input
          type="number"
          name="age"
          value={inputs.age || ""}
          onChange={handleChange}
        />
        </label>
        <input type="submit" />
    </form>
  )
}

const root = ReactDOM.createRoot(document.getElementById('root'));
root.render(<MyForm />);

React Router
Create React App doesn't include page routing.
React Router is the most popular solution.
install React Router
npm i -D react-router-dom@latest
Example App :
#index.js

import ReactDOM from "react-dom/client";
import { BrowserRouter, Routes, Route } from "react-router-dom";
import Layout from "./pages/Layout";
import Home from "./pages/Home";
import Blogs from "./pages/Blogs";
import Contact from "./pages/Contact";
import NoPage from "./pages/NoPage";

export default function App() {
  return (
    <BrowserRouter>
      <Routes>
        <Route path="/" element={<Layout />}>
          <Route index element={<Home />} />
          <Route path="blogs" element={<Blogs />} />
          <Route path="contact" element={<Contact />} />
          <Route path="*" element={<NoPage />} />
        </Route>
      </Routes>
    </BrowserRouter>
  );
}

const root = ReactDOM.createRoot(document.getElementById('root'));
root.render(<App />);

Explanation
We wrap our content first with .
Then we define our . An application can have multiple . Our basic example only uses one.
s can be nested. The first has a path of / and renders the Layout component.
The nested s inherit and add to the parent route. So the blogs path is combined with the parent and becomes /blogs.
The Home component route does not have a path but has an index attribute. That specifies this route as the default route for the parent route, which is /.
Setting the path to * will act as a catch-all for any undefined URLs. This is great for a 404 error page.
Pages / Components
he Layout component has and elements.
The renders the current route selected.
is used to set the URL and keep track of browsing history.
Anytime we link to an internal path, we will use instead of .
The "layout route" is a shared component that inserts common content on all pages, such as a navigation menu.
#layout.js

import { Outlet, Link } from "react-router-dom";

const Layout = () => {
  return (
    <>
      <nav>
        <ul>
          <li>
            <Link to="/">Home</Link>
          </li>
          <li>
            <Link to="/blogs">Blogs</Link>
          </li>
          <li>
            <Link to="/contact">Contact</Link>
          </li>
        </ul>
      </nav>

      <Outlet />
    </>
  )
};

export default Layout;


#Home.js

const Home = () => {
  return <h1>Home</h1>;
};

export default Home


# Blogs.js
const Blogs = () => {
  return <h1>Blog Articles</h1>;
};

export default Blogs;


#contact.js

const Contact = () => {
  return <h1>Contact Me</h1>;
};

export default Contact;


#Nopage.js

const NoPage = () => {
  return <h1>404</h1>;
};

export default NoPage;
Styling React Using CSS
There are many ways to style React with CSS, this tutorial will take a closer look at three common ways:
- Inline styling
- CSS stylesheets
- CSS Modules
Inline Styling
const Header = () => {
  return (
    <>
      <h1 style={{color: "red"}}>Hello Style!</h1>
      <p>Add a little style!</p>
    </>
  );
}


const Header = () => {
  return (
    <>
      <h1 style={{backgroundColor: "lightblue"}}>Hello Style!</h1>
      <p>Add a little style!</p>
    </>
  );
}
JavaScript Object
You can also create an object with styling information, and refer to it in the style attribute
const Header = () => {
  const myStyle = {
    color: "white",
    backgroundColor: "DodgerBlue",
    padding: "10px",
    fontFamily: "Sans-Serif"
  };
  return (
    <>
      <h1 style={myStyle}>Hello Style!</h1>
      <p>Add a little style!</p>
    </>
  );
}
CSS Stylesheet
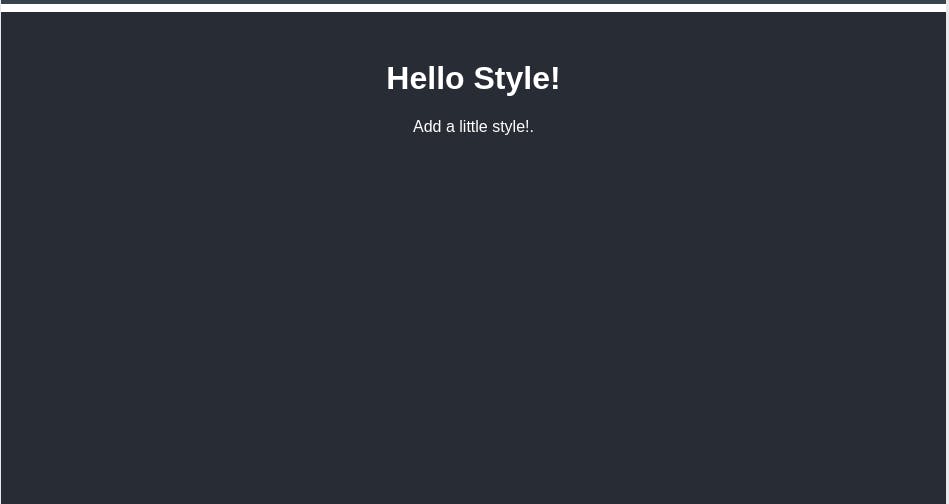
You can write your CSS styling in a separate file, just save the file with the .css file extension, and import it in your application.
Create a new file called "App.css" and insert some CSS code in it
body {
  background-color: #282c34;
  color: white;
  padding: 40px;
  font-family: Sans-Serif;
  text-align: center;
}
Import the stylesheet in your application:
import React from 'react';
import ReactDOM from 'react-dom/client';
import './App.css';

const Header = () => {
  return (
    <>
      <h1>Hello Style!</h1>
      <p>Add a little style!.</p>
    </>
  );
}

const root = ReactDOM.createRoot(document.getElementById('root'));
root.render(<Header />);
CSS Modules
Another way of adding styles to your application is to use CSS Modules.
CSS Modules are convenient for components that are placed in separate files.
The CSS inside a module is available only for the component that imported it, and you do not have to worry about name conflicts.
Create the CSS module with the .module.css extension, example: my-style.module.css.
#my-style.module.css

.bigblue {
  color: DodgerBlue;
  padding: 40px;
  font-family: Sans-Serif;
  text-align: center;
}


#car.js

import styles from './my-style.module.css';

const Car = () => {
  return <h1 className={styles.bigblue}>Hello Car!</h1>;
}

export default Car;
Result

Further more reading, please check it out
React js official documentation
Keep learning & Keep Growing

